월요일과 화요일에 프론트엔트를 구성해보고 백엔드와 API 연결을 하는 것을 진행하였다.
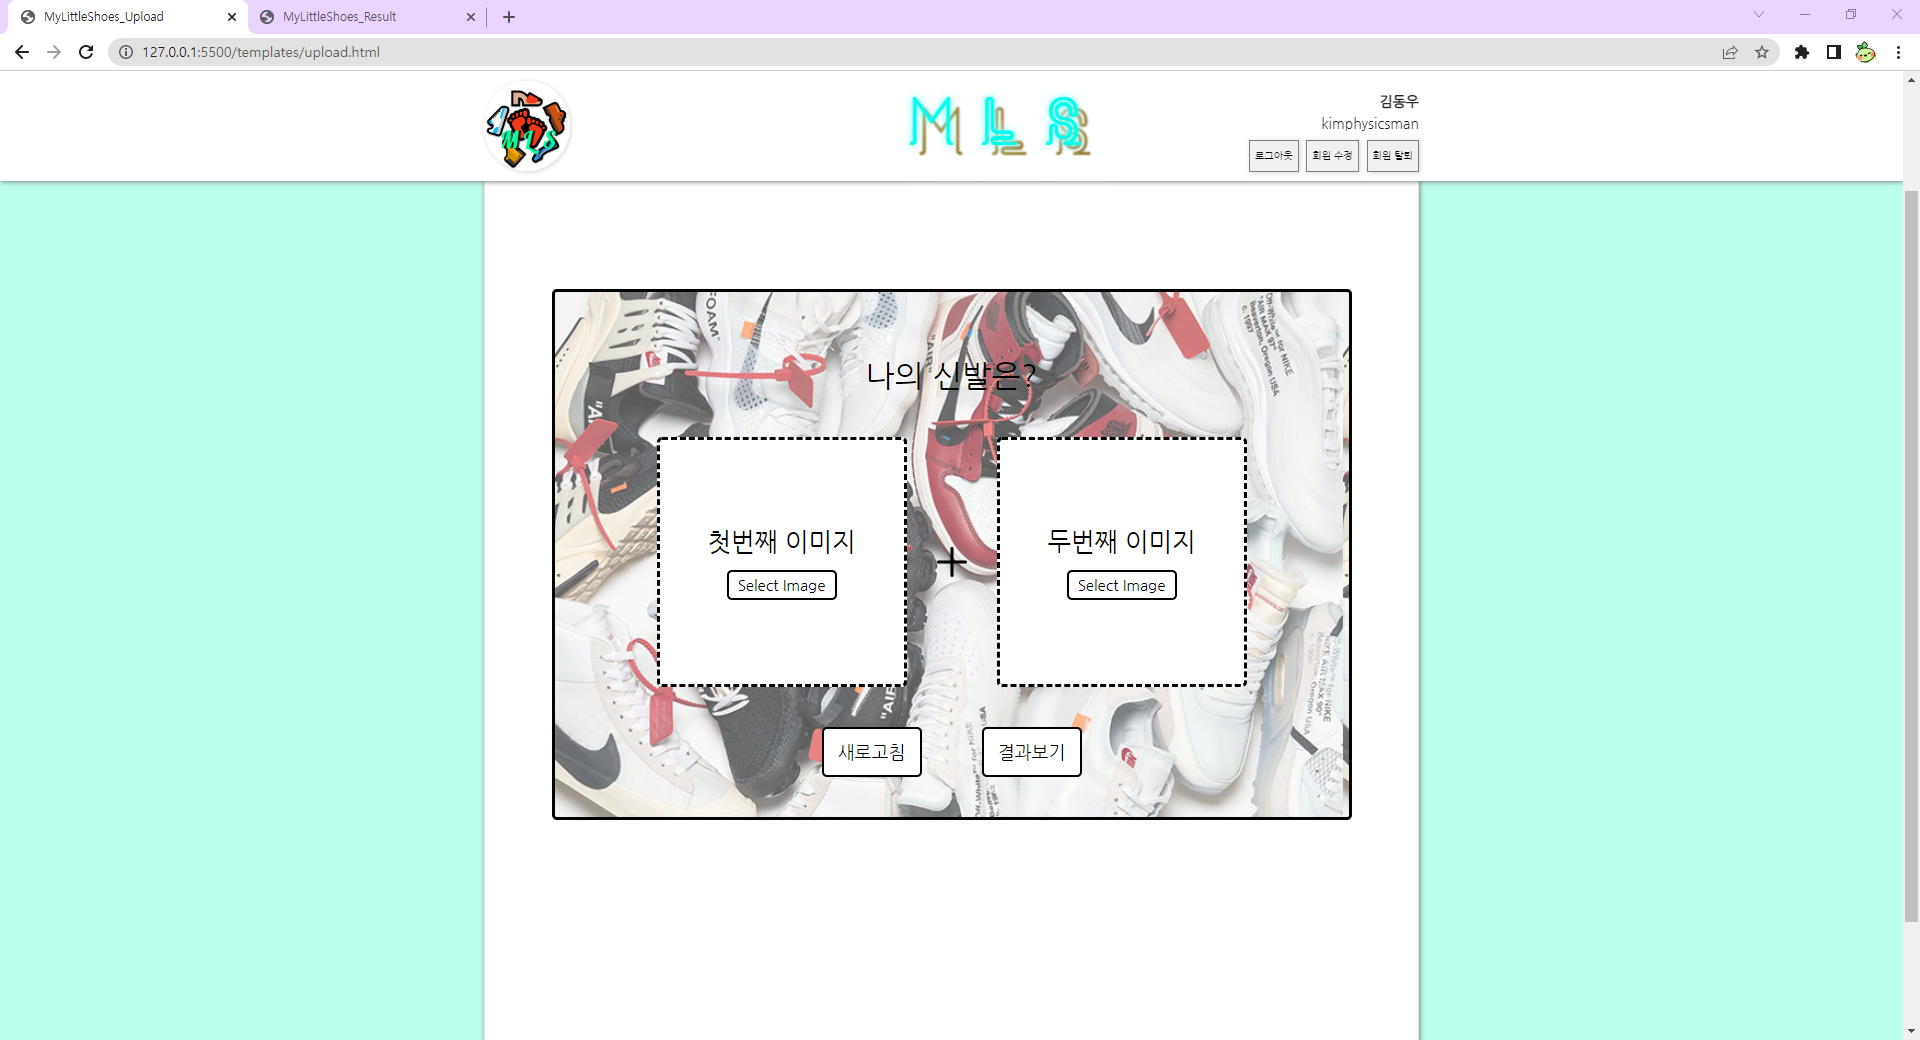

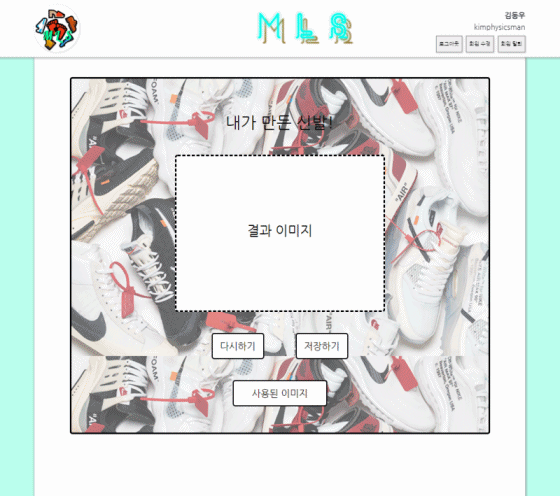
이미지 업로드 및 결과 페이지를 구성하는 역할을 맡았기 때문에 해당 부분에 대한 UI를 만들어주었다.
그리고 Javascript를 이용하여 이미지를 업로드하는 기능과 사용된 이미지를 클릭하면 사용된 이미지 목록을 열어주는 기능을 만들어주었다.
// 이미지 파일 업로드 기능

const aImgBox = document.querySelector(".a_img"),
    aButton = aImgBox.querySelector("button"),
    aInput = aImgBox.querySelector("input");

const bImgBox = document.querySelector(".b_img"),
    bButton = bImgBox.querySelector("button"),
    bInput = bImgBox.querySelector("input");

// 전역 변수
let afile;
let bfile;

// a_img에 해당되는 버튼 클릭 시 입력도 클릭
aButton.onclick = () => {
    aInput.click();
}

// b_img에 해당되는 버튼 클릭 시 입력도 클릭
bButton.onclick = () => {
    bInput.click();
}

// a_img에서 선택한 파일 가져오기
aInput.addEventListener("change", function () {
    afile = this.files[0];
    aImgBox.classList.add();
    aShowFile();
});

// b_img에서 선택한 파일 가져오기
bInput.addEventListener("change", function () {
    bfile = this.files[0];
    bImgBox.classList.add();
    bShowFile();
});

// 선택한 파일을 이미지로 보여주기(첫번째)
function aShowFile() {
    console.log("A 이미지 등록")
    let fileType = afile.type;
    let validExtensions = ["image/jpeg", "image/jpg", "image/png"];
    if (validExtensions.includes(fileType)) {
        let fileReader = new FileReader();
        fileReader.onload = () => {
            let fileURL = fileReader.result;
            const img = document.getElementById("first-img");

            img.src = fileURL;
            aImgBox.appendChild(img);

            var p = document.getElementById("first-p");
            var button = document.getElementById("first-button");

            img.style.display = "block";
            p.style.display = "none";
            button.style.display = "none";
        }
        fileReader.readAsDataURL(afile);
    } else {
        alert("이미지 파일이 아닙니다!");
        aImgBox.classList.remove("active");
    }
}

// 선택한 파일을 이미지로 보여주기(두번째)
function bShowFile() {
    console.log("B 이미지 등록")
    let fileType = bfile.type;
    let validExtensions = ["image/jpeg", "image/jpg", "image/png"];
    if (validExtensions.includes(fileType)) {
        let fileReader = new FileReader();
        fileReader.onload = () => {
            let fileURL = fileReader.result;
            const img = document.getElementById("second-img");

            img.src = fileURL;
            bImgBox.appendChild(img);

            var p = document.getElementById("second-p");
            var button = document.getElementById("second-button");

            img.style.display = "block";
            p.style.display = "none";
            button.style.display = "none";
        }
        fileReader.readAsDataURL(bfile);
    } else {
        alert("이미지 파일이 아닙니다!");
        bImgBox.classList.remove("active");
    }
}

function removeImgButton(afile, bfile) {
    console.log("확인용")
    var a_p = document.getElementById("first-p");
    var a_button = document.getElementById("first-button");
    var a_img = document.getElementById("first-img");

    a_img.src = ""
    a_img.style.display = "none";
    a_p.style.display = "block";
    a_button.style.display = "block";

    var b_p = document.getElementById("second-p");
    var b_button = document.getElementById("second-button");
    var b_img = document.getElementById("second-img");

    b_img.src = ""
    b_img.style.display = "none";
    b_p.style.display = "block";
    b_button.style.display = "block";
}
// 사용된 이미지 보기

// 사용된 이미지 열고 닫기(버튼)
$(function () {
    $(document).ready(function () {
        $(".show_hide_button").click(function () {
            $(".img_box").slideToggle("normal");
            // $(".img_box").fadeToggle("slow");
        });
    });
});
기본적인 UI는 구성되게 되었고, 팀원분들과 함께 잘못된 부분들이나 보완해야 할 부분들을 보면서 고쳐나가는 과정을 진행하였다.

늦은 시간까지 함께 코드를 보고 고치면서 프로젝트를 완성하는 과정을 거쳤다.
그렇게 발표 당일날인 수요일 새벽에 코드를 완성하고 자고 일어난 뒤 마지막 점검을 하고 발표회를 진행하였다.
각 팀들이 만든 프로젝트를 보면서 다른 팀들은 어떤 프로젝트를 만들었는지, 프로젝트를 진행하면서 느꼈던 점 같은 것을 보고 듣는 시간을 가졌다.
그렇게 각 팀의 프로젝트 발표회가 끝이 나고 각 팀들의 팀원들은 다시 모여서 KPT 회고를 진행하면서 하루를 마무리하였다.
KPT 회고 : https://sdrtst.tistory.com/76
[KPT] 22.06.28 ~ 22.07.06 (팀 프로젝트 : DRF 유화 제작 프로젝트(My Little Shoes) KPT)
구현한 프로젝트 - 프로젝트 : DRF 유화 제작 프로젝트(My Little Shoes) 각 팀원 별 프로젝트를 개발하며 느낀 점 : 김동우 : 프로젝트 중간에 혼자 개발하는 기분이 들어서 너무 재미없고 집중하지 못
sdrtst.tistory.com
해당 프로젝트에 대한 코드들은 팀장님께서 종합하여 팀 Github에 올려주셨다.
Style_Transfer : https://github.com/crowsonkb/style-transfer-pytorch
GitHub - crowsonkb/style-transfer-pytorch: Neural style transfer in PyTorch.
Neural style transfer in PyTorch. Contribute to crowsonkb/style-transfer-pytorch development by creating an account on GitHub.
github.com
Backend : https://github.com/nbcamp-AI-2-fantastic4/mylittleshoes_backend
GitHub - nbcamp-AI-2-fantastic4/mylittleshoes_backend: 신발 스타일링 (backend)
신발 스타일링 (backend). Contribute to nbcamp-AI-2-fantastic4/mylittleshoes_backend development by creating an account on GitHub.
github.com
Frontend : https://github.com/nbcamp-AI-2-fantastic4/mylittleshoes_frontend
GitHub - nbcamp-AI-2-fantastic4/mylittleshoes_frontend: 신발 스타일링 (frondend)
신발 스타일링 (frondend). Contribute to nbcamp-AI-2-fantastic4/mylittleshoes_frontend development by creating an account on GitHub.
github.com
-
오늘 발표를 마치며 이번 프로젝트가 끝이 나게 됐다.
다른 팀의 프로젝트를 보면서 '다른 팀들은 저런 식으로 프로젝트를 진행했구나.' 하는 생각을 가지게 되었다.
주관적으로 느끼기에 나는 이번 프로젝트를 하면서 부족한 점도 많이 있었기에 코드 구현에 있어 조금 생각하게 되는 계기가 되었던 것 같다.
그래도 팀장님과 팀원분들의 도움으로 인해 여기까지 올 수 있었던 것 같고, 많은 도움을 받았다고 생각한다.
이제 마지막 프로젝트만을 앞두고 있는 상황인데, 앞으로의 일에 대해 걱정이 많은 성격이라 다소 두렵기도 하고 걱정도 많이 되는 상황이다.
그래도 열심히 해보면서 마지막 프로젝트도 팀원분들과 함께 진행하고 싶다.
:P
'TIL 및 WIL > TIL (Today I Learned)' 카테고리의 다른 글
| [TIL] 2022.07.08 (내일배움캠프 마지막 프로젝트, My Little Trip(2)) (0) | 2022.07.08 |
|---|---|
| [TIL] 2022.07.07 (내일배움캠프 마지막 프로젝트, My Little Trip(1)) (0) | 2022.07.07 |
| [TIL] 2022.07.01 (DRF 유화 제작 프로젝트, My Little Shoes 3) (0) | 2022.07.01 |
| [TIL] 2022.06.29 (DRF 유화 제작 프로젝트, My Little Shoes 2) (0) | 2022.06.29 |
| [TIL] 2022.06.28 (DRF 유화 제작 프로젝트, My Little Shoes 1) (0) | 2022.06.28 |


